Lesson 5: Add Personalized Promotion Emails Triggering
Note: This is an advanced part of the codelab. You are recommended to go through it, but feel free to skip and jump to the Recap.
Now that your app displays a list of customer profiles, let's try adding some user interaction to it. Imagine as a marketer looking at different customer profiles with more extensive data (past orders, date of birth, gender), you may want to send promotional discount codes to some specific customers to motivate them to buy your products. Therefore, we will add a "Send promo code" button.
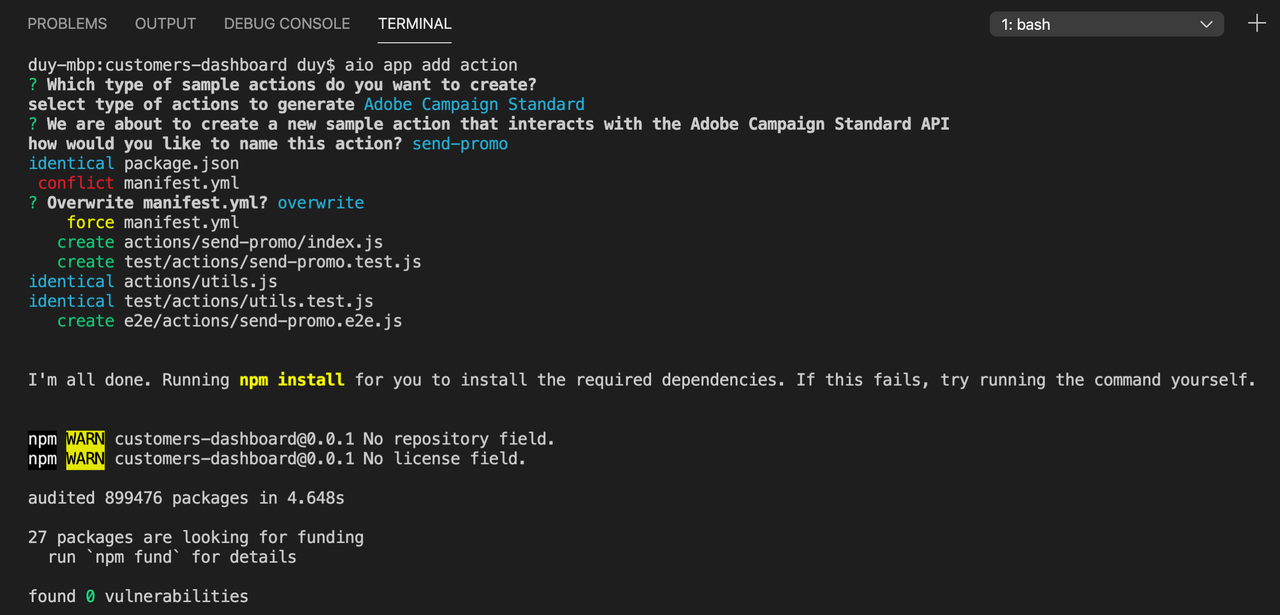
First of all, you need a new action for generating promo code. Here we use the uuid npm package to generate it, and bwip-js to render a visual barcode. Simply add them as a dependency in package.json, and run npm install. To add the new action, run the following aio command, and specify the inputs according to the screenshot below.
Copied to your clipboardaio app add action
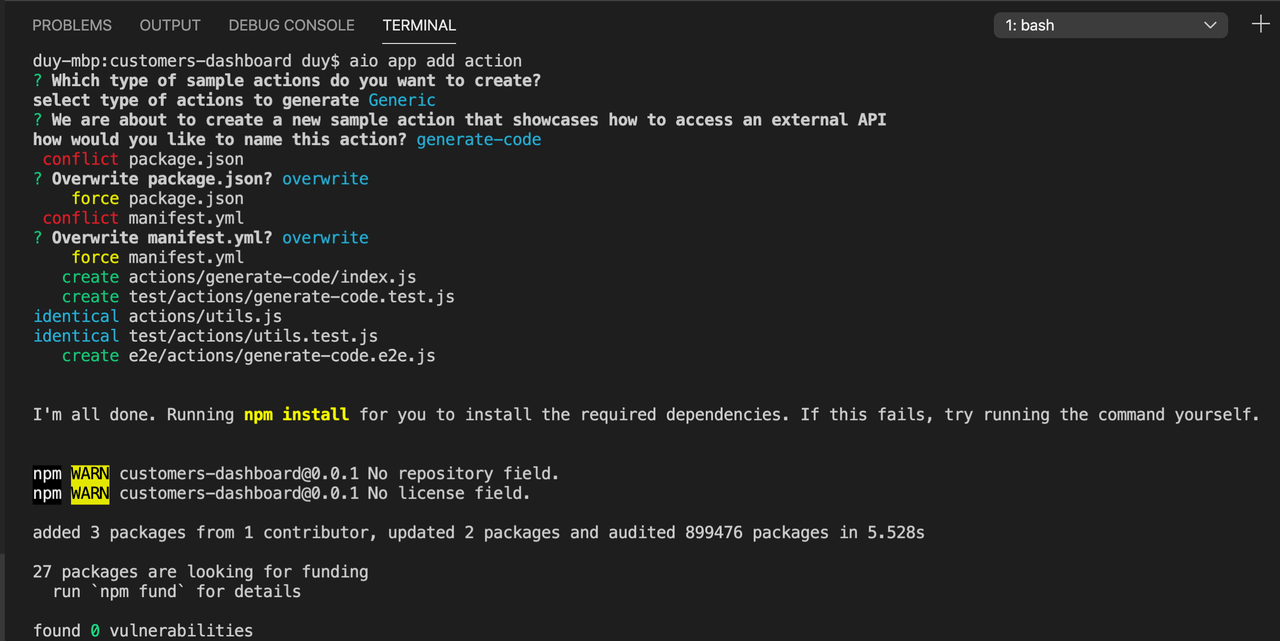
Upon a successful command execution, the generate-code action is added to the ext.config.yaml file, and its source code is at src/dx-excshell-1/actions/generate-code/index.js. As we don't need an authentication on this action, we will remove require-adobe-auth: true from its definition in manifest file, as well as remove the relevant authorization checks in the code. In addition, we add the code for generating UUID and return it in the response body.
Copied to your clipboard/*** This action generates a barcode of a random UUID as personalized promo code*/const { Core } = require('@adobe/aio-sdk')const { v4: uuid4 } = require('uuid')const bwipjs = require('bwip-js')const { errorResponse } = require('../utils')// main function that will be executed by Adobe I/O Runtimeasync function main (params) {// create a Loggerconst logger = Core.Logger('main', { level: params.LOG_LEVEL || 'info' })try {// 'info' is the default level if not setlogger.info('Calling the main action')// generate UUID codeconst promoCode = uuid4()const buffer = await bwipjs.toBuffer({bcid: 'code128',text: promoCode,scale: 2,includetext: true,backgroundcolor: 'ffffff'})const response = {headers: { 'Content-Type': 'image/png' },statusCode: 200,body: buffer.toString('base64')}// log the response status codelogger.info(`${response.statusCode}: successful request`)return response} catch (error) {// log any server errorslogger.error(error)// return with 500return errorResponse(500, 'server error', logger)}}exports.main = main
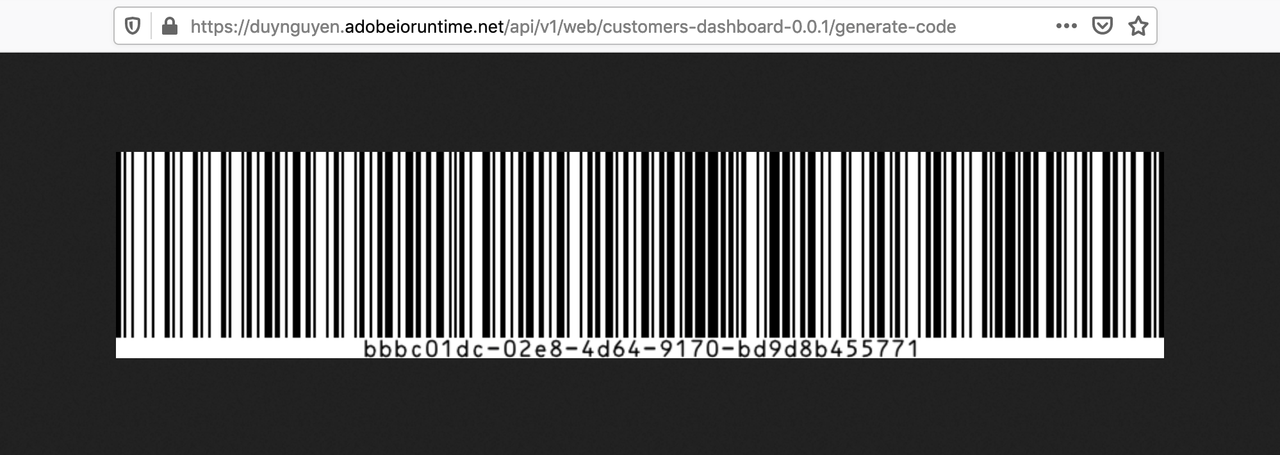
Verify that the new action is working by running the app locally with aio app run, and check the response of https://<your-namespace>.adobeioruntime.net/api/v1/dx-excshell-1/generate-code on the browser. You can find your own URL from the terminal output.
Note: Visit the codelab Headless Apps with App Builder to learn more about building a headless app for barcode generation.
Now that you have it set up in App Builder app, next step is to create a marketing workflow in Campaign Standard which takes care of receiving external signals from the app and sending promotion emails. To do that, go to Marketing Activities > Create > Workflow. Define the properties of your workflow, and finish the creation.
Your new workflow should contain 3 components, in correct order:
- External signal
- Query user by email
- Email delivery
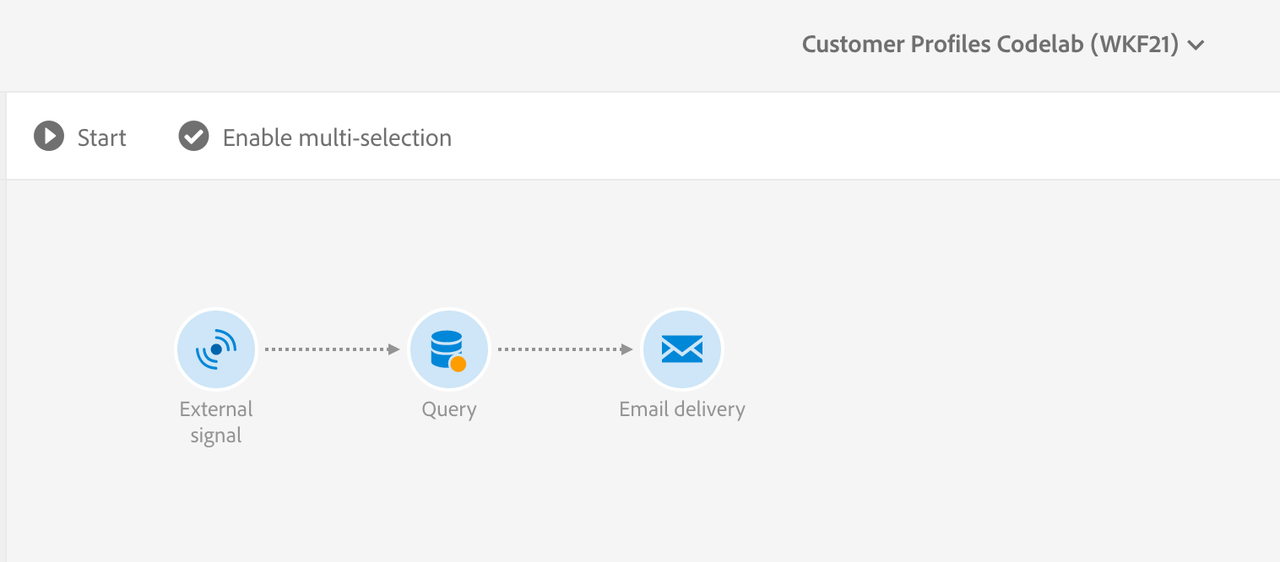
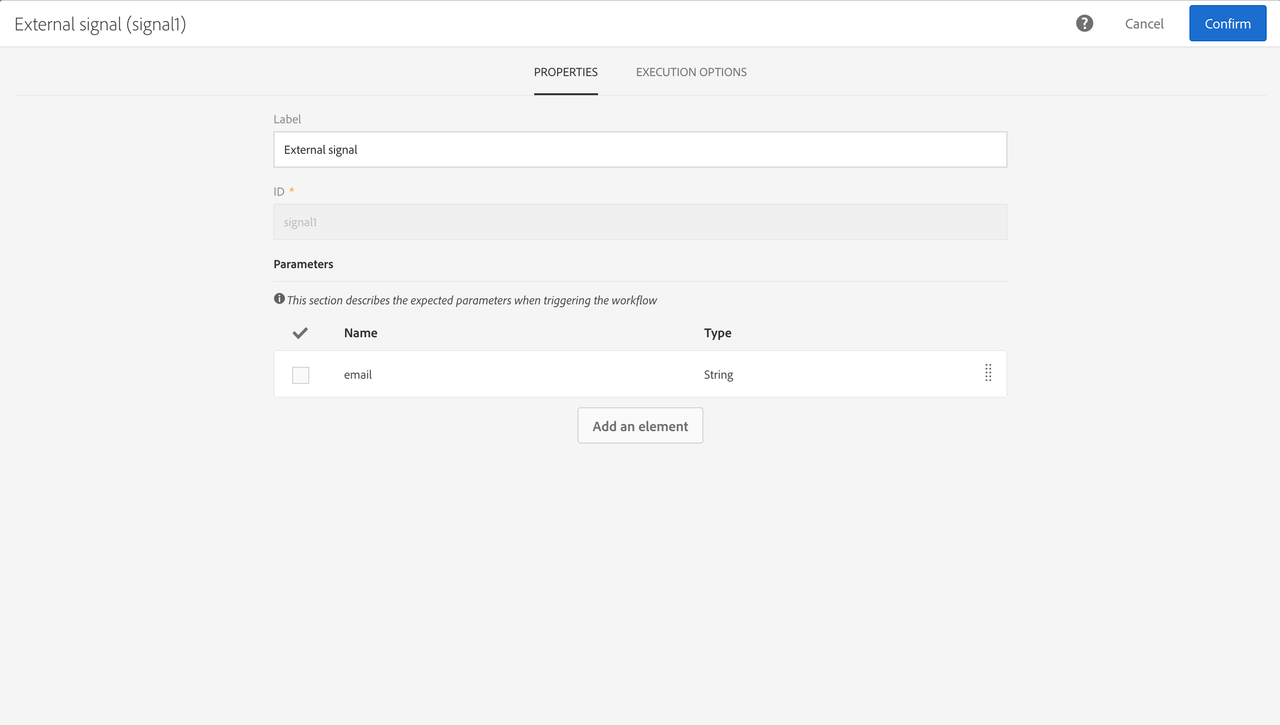
In the "External signal" component, make sure that it accepts email as an input parameter.
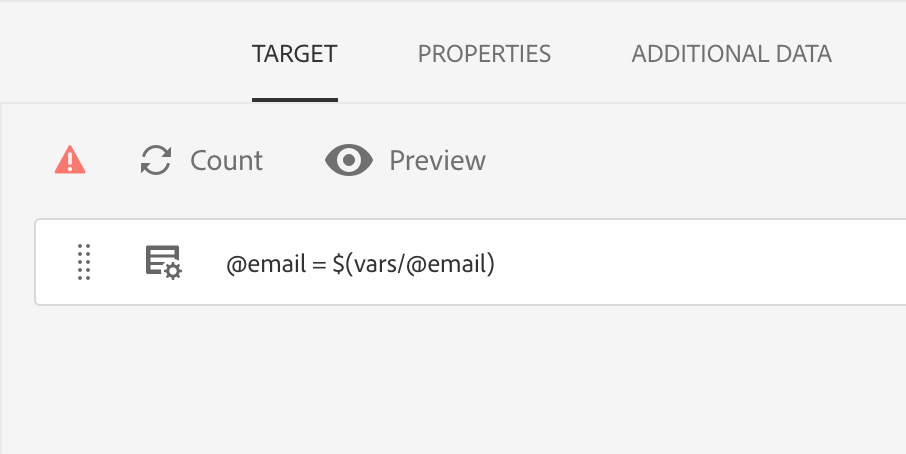
In the "Query" component, make sure that it uses the email param to query user.
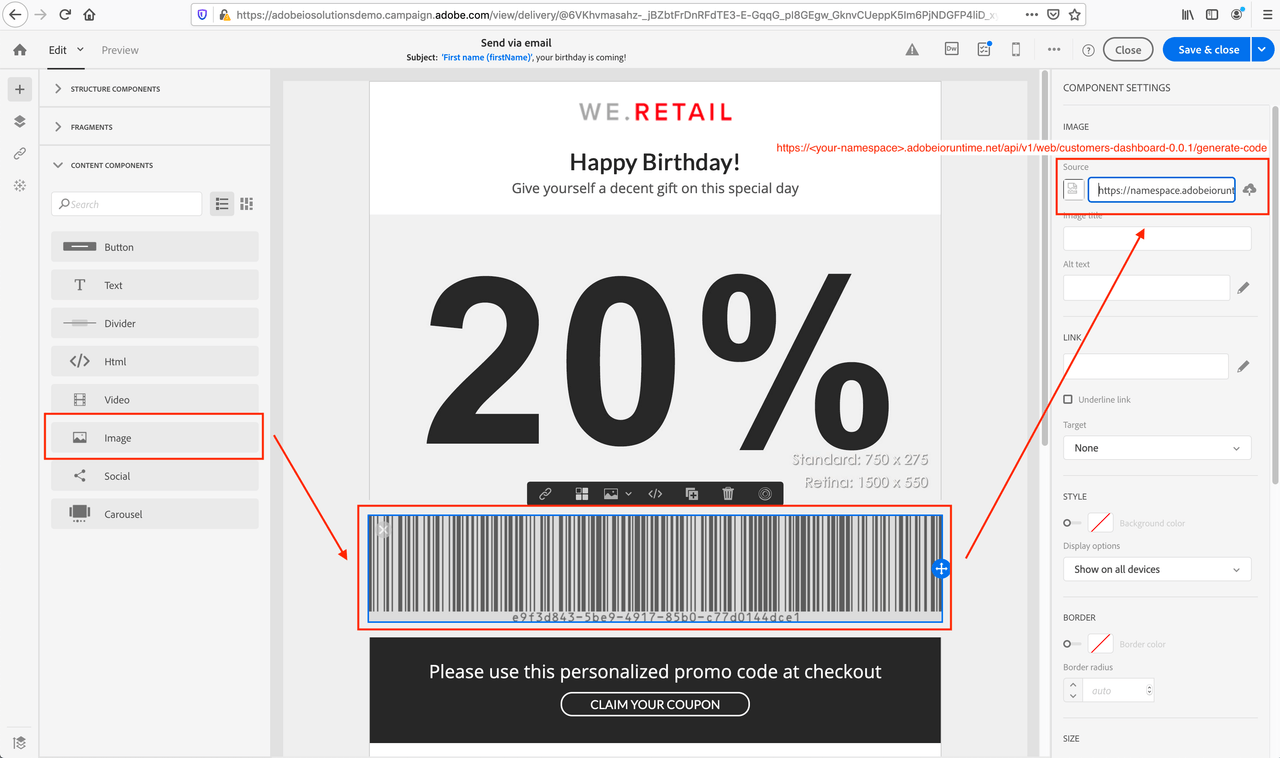
In the "Email delivery" component, go to its editor to design the email. In this lab we will use the "Email Designer" mode, and leverage the available "Astro - Coupon" template.
Design the email as you prefer. One required component is an image that loads the barcode from the generate-code action.
Save your Campaign Standard Workflow and start it. It should be now ready to execute upon external signal triggering!
The last step is to add an action to trigger the Campaign Standard workflow, and a "Send promo code" button on the app UI. We use aio app add action again to add the send-promo action.
In order to trigger the workflow, you need to provide a workflow ID to the triggering API. You can find it on the Campaign Standard UI. In your .env file, add a new variable for it, for example CAMPAIGN_STANDARD_WORKFLOW_ID=WKFXX. This environment variable is then interpreted into a default param of the send-promo action in the ext.config.yaml file.
Copied to your clipboardsend-promo:function: actions/send-promo/index.jsweb: 'yes'runtime: 'nodejs:14'inputs:LOG_LEVEL: debugtenant: $CAMPAIGN_STANDARD_TENANTapiKey: $SERVICE_API_KEYworkflowId: $CAMPAIGN_STANDARD_WORKFLOW_IDannotations:require-adobe-auth: truefinal: true
Then you should update the source code at actions/send-promo/index.js as following:
Copied to your clipboard/*** This action triggers Campaign Standard workflow to send promotion email to a specific email address*/const { Core } = require('@adobe/aio-sdk')const { CampaignStandard } = require('@adobe/aio-sdk')const { errorResponse, getBearerToken, stringParameters, checkMissingRequestInputs } = require('../utils')// main function that will be executed by Adobe I/O Runtimeasync function main (params) {// create a Loggerconst logger = Core.Logger('main', { level: params.LOG_LEVEL || 'info' })try {// 'info' is the default level if not setlogger.info('Calling the main action')// log parameters, only if params.LOG_LEVEL === 'debug'logger.debug(stringParameters(params))// check for missing request input parameters and headersconst requiredParams = ['apiKey', 'tenant', 'workflowId', 'email']const errorMessage = checkMissingRequestInputs(params, requiredParams, ['Authorization'])if (errorMessage) {// return and log client errorsreturn errorResponse(400, errorMessage, logger)}// extract the user Bearer token from the input request parametersconst token = getBearerToken(params)// initialize the sdkconst campaignClient = await CampaignStandard.init(params.tenant, params.apiKey, token)// get workflow from Campaign Standardconst workflow = await campaignClient.getWorkflow(params.workflowId)const wkfHref = workflow.body.activities.activity.signal1.trigger.href// trigger the signal activity APIconst triggerResult = await campaignClient.triggerSignalActivity(wkfHref, { source: 'API', parameters: { email: params.email } })// log the trigger resultlogger.info(triggerResult)const response = {statusCode: 200,body: { success: 'ok' }}// log the response status codelogger.info(`${response.statusCode}: successful request`)return response} catch (error) {// log any server errorslogger.error(error)// return with 500return errorResponse(500, 'server error', logger)}}exports.main = main
To update the UI, open Home.js and add method sendPromo() as following.
Copied to your clipboardasync sendPromo (email) {try {const headers = {}// set the authorization header and org from the ims props objectif (this.props.ims.token && !headers.authorization) {headers.authorization = 'Bearer ' + this.props.ims.token}if (this.props.ims.org && !headers['x-gw-ims-org-id']) {headers['x-gw-ims-org-id'] = this.props.ims.org}const actionResponse = await actionWebInvoke(actions['send-promo'], headers, { email })console.log(`Response from send-promo:`, actionResponse)} catch (e) {// log and store any error messageconsole.error(e)}}
Finally let's update the renderred profiles grid view to include the send promo button. As we're using new React Spectrum components for the confirm dialog, make sure that they are imported properly in Home.js.
Copied to your clipboard// importing confirm dialog components, along with previously available componentsimport { ActionButton, AlertDialog, DialogTrigger, Flex, Grid, ProgressCircle, Heading, Text, View } from '@adobe/react-spectrum'
Copied to your clipboard// in render(), update the Grid componentrender () {const profiles = this.state.profilesconsole.log(`profiles object:`, profiles)return (<View><Heading level={1}>Customer Profiles</Heading><Flex UNSAFE_className='profiles'><ProgressCircleUNSAFE_className='actions-invoke-progress'aria-label='loading'isIndeterminateisHidden={ !this.state.actionInvokeInProgress }/>{ !!profiles &&<Grid>{profiles.map((profile, i) => {return <Flex UNSAFE_className='profile' key={ profile['PKey'] }><DialogTrigger><ActionButtonUNSAFE_className='actions-invoke-button'>Send promo code</ActionButton><AlertDialogvariant='confirmation'title='Send promo code'primaryActionLabel='Confirm'cancelLabel='Cancel'onPrimaryAction={ () => this.sendPromo(profile['email']) }>Do you want to send promo to { profile['email'] }?</AlertDialog></DialogTrigger>Name: { profile['firstName'] } { profile['lastName'] } - Email: { profile['email'] } - Date of birth: { profile['birthDate'] }</Flex>})}</Grid>}{ !profiles &&<Text>No profiles!</Text>}</Flex></View>)}
After that, execute aio app run again so that your app is running locally.
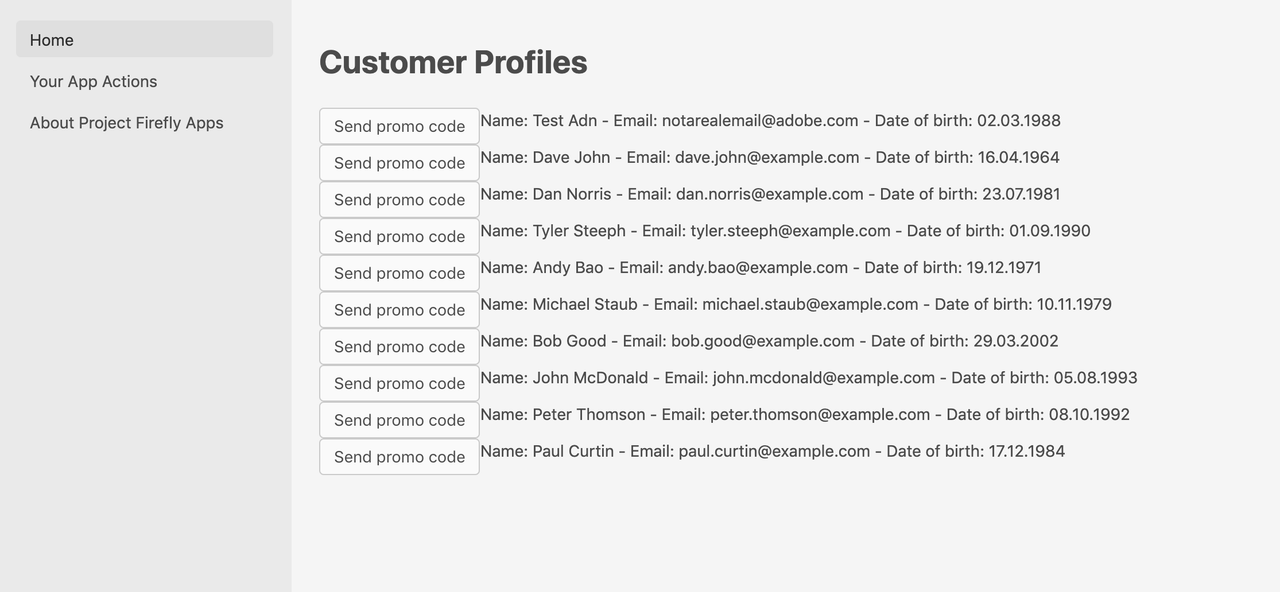
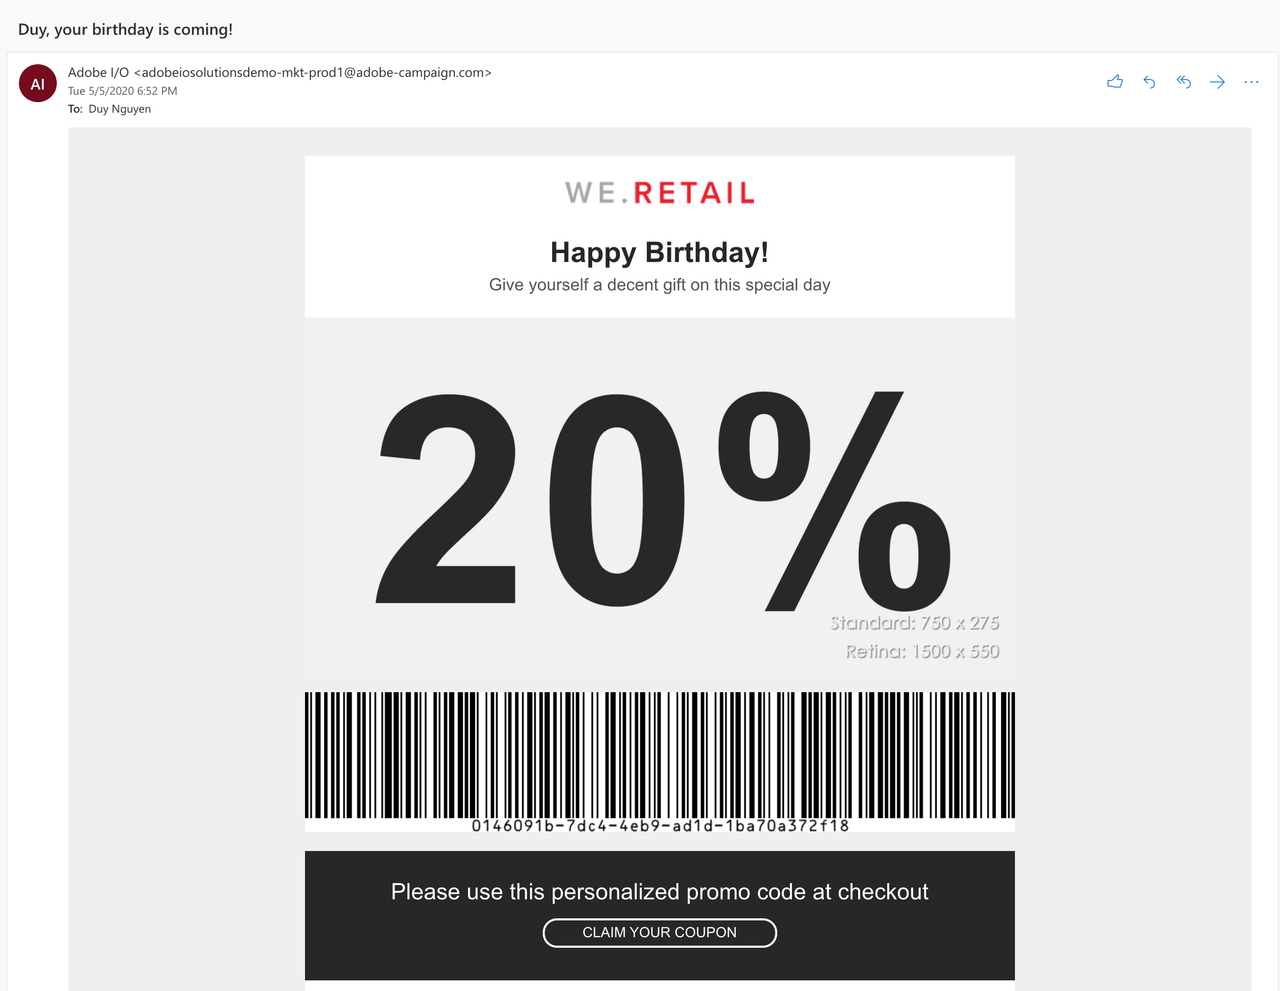
Try clicking to send promo to a profile which has your own email address. There will be a prompt confirming your command. Check your email inbox that you have received a promo email.
